One of the great things about living in the Los Angeles area is the access we have to some great museums. The LA County Museum of Art just opened their new buildings by architect Renzo Piano, and in one of the smaller side galleries we came across an exhibit on antique fashion.They had clothing dating from the late 1700s to around the turn of the last century on display, and it was just a great surprise to stumble across this little gem of an exhibit.One of the things that was cool to see as a designer is the contrast between what an article of clothing does (it's function) and what it looks like (it's form). The clothes on display had long since left behind the simple function of "keeping me from being naked". They had taken on an incredible number of other attributes: symbols of wealth, status, class and taste. These were showpieces. And a raw sexuality permeated the undergarments of the time. They appeared to supercharge the natural signs of fertility: fertile hips and narrow waist taken to an extreme degree. Combined with a waist-cinching corset, the hoop skirts and cage-like butt-boosting undergarments must have made quite a visual impact. These garments seemed very theatrical, larger-than-life, and must have been inconvenient and uncomfortable to wear. We also agreed that for most of the clothing exhibited, these were things made for the upper class to wear for special events. This wasn't every-day wear for normal folk.
 Like a lot of bondage wear, these items would have forced a change in your posture, your gait, your ability to move freely. It would have taken someone to help you get in and out of a lot of the garments. One outfit that particularly caught my eye was the corset and fetish boots (of course!). The underwear has an open crotch, and are made of black silk with contrasting yellow silk ribbons. The fetish boots are made in Belgium, and the corset is from England, both circa 1900.
  The corset was extremely fine-grained and shiny leather, and the stitches were incredibly close together. I couldn't get a clear view of the front, but I don't think there was a catch 0r quick-release mechanism from what I could tell. The only way in would be lacing it on, a time-consuming proposition. There was a built-in ritual to wearing this article of clothing.
  The boots were really incredible as well. The shape is made to fit the contour of the back of the leg in the most seductive way, especially around the ankle and heel. These also laced up with very closely-spaced lacing grommets, which would take a long, long time to lace all the way. No zippers or speedlaces to make putting these on go faster, it would take you time to get both in and out of these beauties. I loved everything about these boots: the shape of the heel, the rounded toe, they way the fit along the arch, the tan-color of the soles. They were just perfect. My great-grandfather was a shoemaker in Austria around this time. I wonder if he ever got to make a pair like these.
 There was a second pair of fetish boots on display, this pair showing off its vibrant red silk lining. The laces on this pair were set a little further apart, but as you can see they are very long, and would have reached up far beyond the knee. I'm thinking these are crotch-high. I was struck by the timelessness of certain fetish clothing. Come back a few hundred years from now, and these will still be just as sexy as they are now, and were back then.
 I just love the thought that certain themes are timeless, and as much as we think we are cutting-edge or groundbreaking sexually, kinky clothing has been around in one form or another for as long as humans have been around. Can't wait to see what we come up with next…
 Until next time, take care - and Happy New Year!
Today I'll be taking you through the making of a butterfly straitjacket in a heavy black patent leather. The original pattern is from back in 2003, but I've made a couple of modifications to the collar and the arm pockets. In the picture below are the patterns for the back panel, front panel, arm pocket sides and the old and new collar.  The leather I'm working with is a heavy black patent cowhide, which should look really sexy and be nice and restrictive. The heavier the weight of the leather, the stiffer and more restrictive it is for the wearer. Of course, you have to find a balance, as the stiffest possible leather would be uncomfortable, and wouldn't conform to the wearer. If you use a leather that is too light, it won't feel restrictive and could be easily ripped. This patent leather offers a happy medium. Or, let's say medium-heavy. =0)
  Now it's time to trace out the pattern for the sides of the arm pockets.
  I have marked the pattern so I can orient the pieces correctly when assembling. There is a contour to this piece, so the arm pockets taper at the wrist and get wider at the elbow. I also need to flip the pattern, as it is not symmetrical.
  Here I have all the pieces laid out; arm pockets, front panels, rear panels and collar.
  Time to get the clips out...
  I start by assembling the arm pockets. Using the shaped front panel as a guide, I clip the side strip along the entire edge. I make small cuts to allow the strip to follow the contour of the arm pocket.
  I try and stop just short of the sew line, so I won't end up with the slits visible on the outside of the finished piece.
  Yes, I use a lot of clips!! (If you ever need a Christmas present for a leather crafter, these things are great. You can never have too many.)
  I also clip the front seam together for sewing:
 Here we have a finished seam:
  The next step is to attach the back panel to the arm pockets. More clips.
  Once these are sewn, it's on to the first glue-ups. To glue the seam inside the arm pockets I have to rough-up the shiny surface of the patent leather. Otherwise the glue will not stick, and the seam will not be held flat. I used a coarse sandpaper to rough up the surface.
 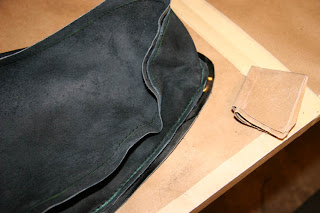 I also glue down the seam allowance on the front panel at this point.
  Here I'm waiting for the glue on the arm pockets to set up.
  Once the glue is ready, I can flatten the seam.
  It's hard to see in the photo, but here's the front seam flattened from the outside.
  Next up, I'll sew the rear panels to the front panel at the shoulders and side. Once those seams are sewn, I can glue down and flatten the seam allowance as well.
  The next operation involves setting in the arm pockets. At this stage I want to turn the arm pocket right-side out.
 The arm pocket is placed inside the jacket body, right side out.
  I align the center top of the arm pocket to the shoulder seam, and clip in place. This is one time where I wish I had a cylinder-head sewing machine instead of a flat-bed. It would make this type of thing much easier.
  Here is the jacket with arm pockets attached:
  Now to attach the collar. The center mark of the collar aligns on the center seam of the jacket body.
  Working from the center out, I'll attach clips along the way.
  Now we have the collar attached!
  It's starting to look really great at this point.
  At this point, the collar is unfinished. I'll turn the seam and sew it down.
  I want to check the rear opening at this point, to make sure the collar is even on both sides. I want the height of the collar to align properly, and now is the time to make any necessary adjustments.
  That looks just right!
  OK, at this stage, we have all of our seams glued down.
  Just a couple more things to do to wrap this one up.
  I need to cut a couple of 2-inch strips: one for the jacket's bottom edge, and one for the tongue that will protect the skin from the zipper.
  For the bottom edge, I'm doing a rolled edge. I'll attach the good side of the patent to the good side of the jacket, aligning both edges and holding with clips.


 Once this is sewn, I trim the strip to align with the edge of the jacket opening.
  Then I run glue along the entire bottom edge, both on the strip and the inside of the jacket.
  The strip is folded up, and top-stitched along the edge of the rolled seam.
  I love the polished look this gives the edge. Plus, it reinforces and strengthens the edge as well.
 Now it's time to set the zipper. I use a YKK #5 nylon coil separating zipper, and will use masking tape to hold it in place while sewing.
  The most important part is to align the zipper properly at the bottom of the opening.
  Here's our zipper ready for sewing (well, the first half, anyway...).
  And after.
  Now, using a combination of tape and clips, I'll hold the other side of the zipper in place for sewing. Patent leather and slick vinyls can offer a particular challenge when sewing, as the slick surface can make feeding the material through difficult. I want to make sure that the other half of the zipper doesn't go anywhere, as if if moves it won't align properly.
  OK, now we have the second half of the zipper attached. I want to trim my zipper to length, but before I do, I need to make sure the pull won't come off the end of the zipper chain.
  I'll use heavy waxed thread to make a zipper stop at just the right length. Just a couple of turns on each side will be enough the keep the pull from going too far. Then I trim the zipper chain and singe the edge with a lit match to keep it from unraveling.
  Finally, we come to the last operation: the tongue. I want to run this along the zipper using a second line of stitches. As with the zipper, I'll use the masking tape to hold the tongue in position while sewing.
  And there we have it: tongue complete!
 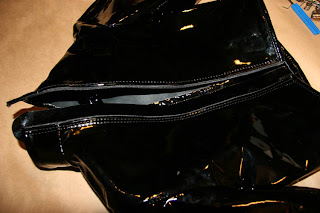 Jacket complete! Front view:
  And back view:
  And on it just looks amazing. I'll have to take better pictures, as it's rather hard to shoot.
 That's about it for this project. I look forward to making more projects in patent leather in the coming year. I could see a full F-suit or sleepsack in heavy patent, can't you? Thanks for visiting, and see you next time...

 Combined with a waist-cinching corset, the hoop skirts and cage-like butt-boosting undergarments must have made quite a visual impact. These garments seemed very theatrical, larger-than-life, and must have been inconvenient and uncomfortable to wear. We also agreed that for most of the clothing exhibited, these were things made for the upper class to wear for special events. This wasn't every-day wear for normal folk.
 Like a lot of bondage wear, these items would have forced a change in your posture, your gait, your ability to move freely. It would have taken someone to help you get in and out of a lot of the garments.
  The corset was extremely fine-grained and shiny leather, and the stitches were incredibly close together. I couldn't get a clear view of the front, but I don't think there was a catch 0r quick-release mechanism from what I could tell. The only way in would be lacing it on, a time-consuming proposition. There was a built-in ritual to wearing this article of clothing.
  The boots were really incredible as well. The shape is made to fit the contour of the back of the leg in the most seductive way, especially around the ankle and heel. These also laced up with very closely-spaced lacing grommets, which would take a long, long time to lace all the way. No zippers or speedlaces to make putting these on go faster, it would take you time to get both in and out of these beauties.
  There was a second pair of fetish boots on display, this pair showing off its vibrant red silk lining. The laces on this pair were set a little further apart, but as you can see they are very long, and would have reached up far beyond the knee. I'm thinking these are crotch-high.
  I just love the thought that certain themes are timeless, and as much as we think we are cutting-edge or groundbreaking sexually, kinky clothing has been around in one form or another for as long as humans have been around. Can't wait to see what we come up with next…
 Until next time, take care - and Happy New Year!


