Hello everyone, and welcome to the last few steps of our f-suit project. If you have been following along from the beginning, this post will complete the project we began back in March for a custom-made f-suit with attached hood, removable gag and blindfold. Last time we spoke about this project the hood was being sent to the client so they could indicate the positioning for the strap holes and buckles. Since this hood is attached directly to the body of the f-suit, I wanted to make sure the positioning was just right before I proceeded with the project. I received the hood back with very accurate and clear markings (thank you, client) - and am ready to get to work. Marks were made on both the straps and the hood, so based on those markings I could make adjustments and figure out where the buckles need to go. I shifted the buckle positions a little bit to get them lined up, and made sure to adjust the position of the strap holes accordingly.  Now it's time to start building the straps. We'll need a total of six, and I make the marks using a little template. This tells me how long the straps need to be, and helps me position the rivet holes and the buckle slot.
 Here are the 6 straps (with one riveted to the buckle already).
  The ol' handy-dandy slot cutter gets some use here...
 Fast-forward to buckle completion:
 The buckle straps have two thicknesses of leather, and to match that (as well as to reinforce the stress points where the buckles are attached) I want to glue and sew in a reinforcement shape. I try to come up with a shape that compliments the lines of the hood.
 I apply some glue to the hood and the reinforcement strips.
  And press them into place. I traced the pattern shape with a pen, and I'll use that as a guide to sew the shapes to the hood as well. I try to avoid having parts held together exclusively by glue. It always is stronger if you can sew it as well.
  Here's the view from the outside.
 Both reinforcements sewn into place.
 I just lay the buckles on to check positioning because I am not ready to rivet them in place just yet. There is a lot of handling yet to come, and I don't want to bang around and potentially scratch the buckles. At least this gives you an idea of what the final will look like.
  Now we're ready to attach the hood to the body. For this the clips come out in full-force. We align on the middle centerline and work our way out.
  Once the hood is sewn in, it's time to glue the rear seam.
 Once that seam is glued down and flattened, it's time to sew in the zipper. I use a #10 YKK heavy-weight zipper on projects like this. They are very high-quality and can take a lot of abuse.
  Here's a closeup of the turned seam, ready to take the zipper. One reason I wait to turn the seam until the hood is attached is it allows me to make adjustments if necessary to make sure the seams align. Leather is stretchy, so it helps to leave yourself wiggle room when making parts that need to lign up.
 I've taped one half of the zipper in place, and am ready to sew.
 With the first zipper half complete, I now tape the other half in place. I really pay attention to the beginning, end, and wherever seams cross over to make sure everything is lined up. Clips and tape are your friends.
  Fortunately, sewing the second half of the zipper goes well...
 Closeup of the 2 pulls, allowing access anywhere along the zip.
 It is definitely tricky to sew this zipper, as it goes all the way to the top of the hood.
 This project has another unique element requested by the very creative client: a laced panel for the hood that would reside inside the zipper. It took a while for me to figure out exactly how I was going to do this, but I eventually came up with a laced-tongue solution. Getting it sewn into place was going to be tricky, but alas, not impossible. I started with 2 strips that would have the lacing grommets set into them.
 These were sewn to the tongue shape after first being clipped into place.
 After sewing:
 At this point, I used tape to hold the tongue in position, with the lacing grommets sitting just inside the zipper. On the first side I could sew while laying the hood flat. On the second side, I actually sewed through the open-face of the hood. It was only possible because the hood was open faced. Otherwise, there would be no access to sew the second seam.
  It's a cool idea, that's for sure. The suit will have a super-clean look from behind once the zipper is pulled up.
  At this stage, I actually added another zipper pull as well based on a request from the client. Now there can be two openings anywhere along the zipper instead of just one.
  Now one last thing before we can move on to attaching the arms and legs, and that is a tongue for the rest of the suit. I start off with a 44-inch strip...
 ...taped into position.
 And sewn into place.
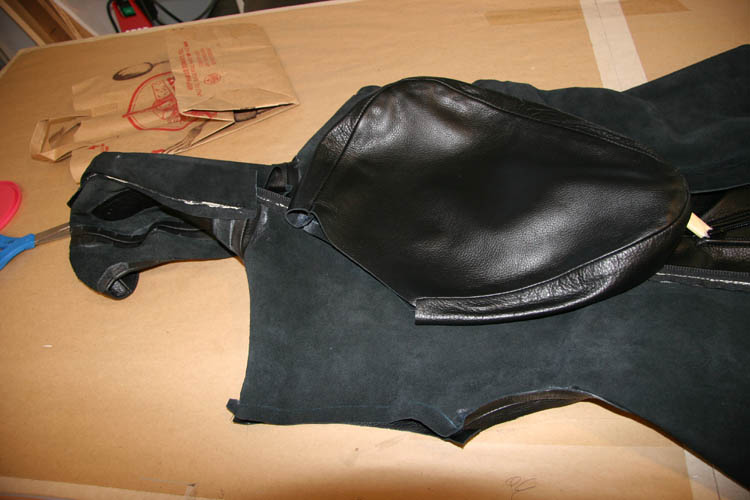
  Now we're ready to move on to arms and legs. These I sew in with the body of the f-suit turned inside-out. The arm pocket itself is right-side out.
  It can be confusing, so it helps to have the left and right arms marked before you start assembling.
  I align the center mark of the arm pocket to the top seam of the body.
 Our friends the clips are back.
  Just a wide shot, so you get an idea of what it looks like.
  We sew around the opening and repeat for the other side.
  Here she is turned right-side out. Looks great!
 Now, on to the legs. If you thought the arms are confusing, wait 'til you tackle the legs. I resort to tape here to make sure the proper seams are aligned. For this f-suit pattern, I align the outside top leg pocket seam with the side seam of the body. A little tape with an "R" for the right leg...
 And body seam...
 Same drill as before with the arm pockets, just a lot more clips, and at this point it is getting bulky and akward to move the piece through the machine. It's the reason I try and attach the largest pieces last.
  And there you have it, both arms and legs sewn into place!
 Now it's time to glue and flatten our seam allowances at the arms and legs.
 And that is it. Actually, I had to attach the buckles to the hood as well, but didn't get any pictures of that. Once the glue dried I pounded all the seams flat and turned the piece right-side out.
  Here's a closeup of the back of the hood, and you can see the buckles in place.

 A peek at the lacing panel...
 And a test-fit of the gag and blindfold. Looks great, and I'm really happy with the way it turned out. I am hoping that the client will love the piece as well, and have many years of fun with it!
 The f-suit is probably the most challenging thing I make on a regular basis. The process goes by quickly when reading the blog entries, but it takes about 40 hours of work in the real world to put one together, spread over a few weeks time. Thank you all for following along, I hope you enjoyed it, and see you next time!

 Unfortunately, there is no pretty girl trapped inside...
 Here's a closeup detail of the crotch zip.
 This f-suit is unique in the placement of the leg-pocket zipper. Usually I run it along the bottom of the leg-pocket but on this suit it runs from above the knee to the toe.
 This f-suit also features a custom-shaped gag and blindfold with an open-faced hood.
 The leather on this project is soooo pretty. The pictures don't do it justice.